Navigating the roads of wireless camera installation can be smoother than you think. You’ve decided to enhance your vehicle’s safety by installing a wireless camera system, and it’s a wise move. These eyes in the back of your head will give you a broader view and peace of mind.
First, you’ll need to understand the technology that’ll be your co-pilot in this endeavor. Choosing the right system is crucial—it’s got to fit your vehicle like a glove. You’ll also need to prep your workspace and gather the necessary tools.
Mounting your cameras securely and establishing a reliable electrical connection are the next steps on your journey. Don’t worry; you’ll also get troubleshooting and maintenance tips to keep your system in top gear. Let’s roll up your sleeves and get started.
Key Takeaways
- Choose a wireless camera system with high-definition resolution and a frame rate of at least 30 fps for clear and smooth footage.
- Ensure the camera system has infrared night vision for low-light conditions.
- Properly install the camera system by following the manufacturer’s instructions and syncing the cameras to the display monitor.
- Use a wiring kit that can handle the camera’s power requirements, provides circuit protection, and is compatible with the vehicle’s fuse panel or electronics area.
Understanding Wireless Camera Technology
Before diving into the installation process, it’s essential to grasp how wireless cameras function and communicate with your vehicle. You’ve likely seen these nifty gadgets popping up in modern cars and trucks, aimed at improving safety and convenience. But what’s going on under the hood?
Wireless vehicle safety cameras operate by transmitting video signals over radio frequencies. The camera, mounted on the rear, side, or front of your vehicle, captures images and sends them to a receiver connected to a display inside your vehicle. This happens in real-time, giving you a crystal-clear view of your surroundings without the hassle of running long wires through your car.
Most of these cameras use Wi-Fi or Bluetooth technology for communication, ensuring a stable connection between the camera and the receiver. You’ll usually find that they’re powered by your vehicle’s electrical system, tapping into the backup lights for energy, which also signals the camera to activate when you’re reversing.
Selecting the Appropriate System
When choosing your wireless vehicle safety camera, you must consider the camera quality to ensure you’re getting clear, reliable footage. It’s equally important to check system compatibility; your camera system should seamlessly integrate with your vehicle’s existing setup.

Let’s explore what makes a camera system a good fit for your safety needs.
Camera Quality
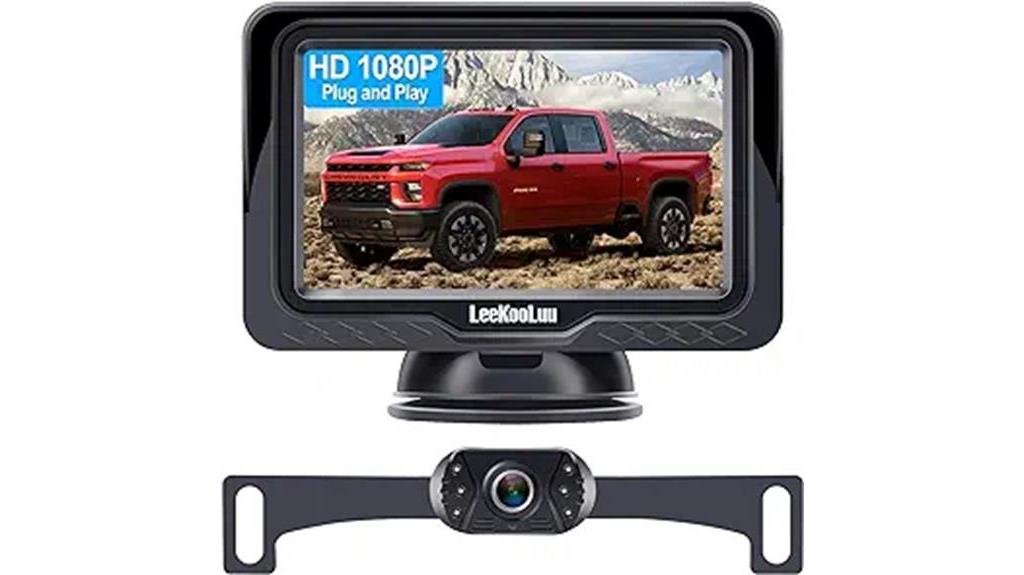
Selecting a system with high-definition resolution is crucial for ensuring the clarity of your vehicle’s safety camera footage. You’ll want to aim for at least 1080p to capture details like license plates and faces. Remember, the higher the resolution, the clearer the image. But don’t just stop at resolution; consider the camera’s frame rate, which affects how smoothly videos play. Look for a frame rate of at least 30 frames per second (fps) to avoid choppy footage.
Additionally, check for low-light capabilities since many incidents occur at night or in poor lighting conditions. A good system should have infrared (IR) night vision to ensure 24/7 effectiveness.
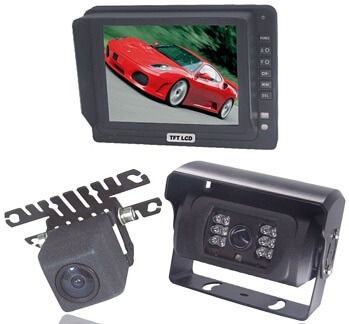
System Compatibility
You’ll need to ensure that the wireless camera system you choose is compatible with your vehicle’s make and model. Not all systems work with every car, so check the specifications before making a purchase. Pay attention to the camera’s connectivity options and confirm that it can interface seamlessly with your vehicle’s onboard systems.
Additionally, consider the installation process. Some vehicles may have unique requirements or limitations that affect where and how cameras can be mounted. It’s vital to select a system that comes with all necessary mounting hardware and instructions tailored to your vehicle.
Lastly, it’s smart to think about future upgrades. Opt for a system that allows for expansion, ensuring that you won’t need to replace the entire setup if you decide to add more cameras later on.
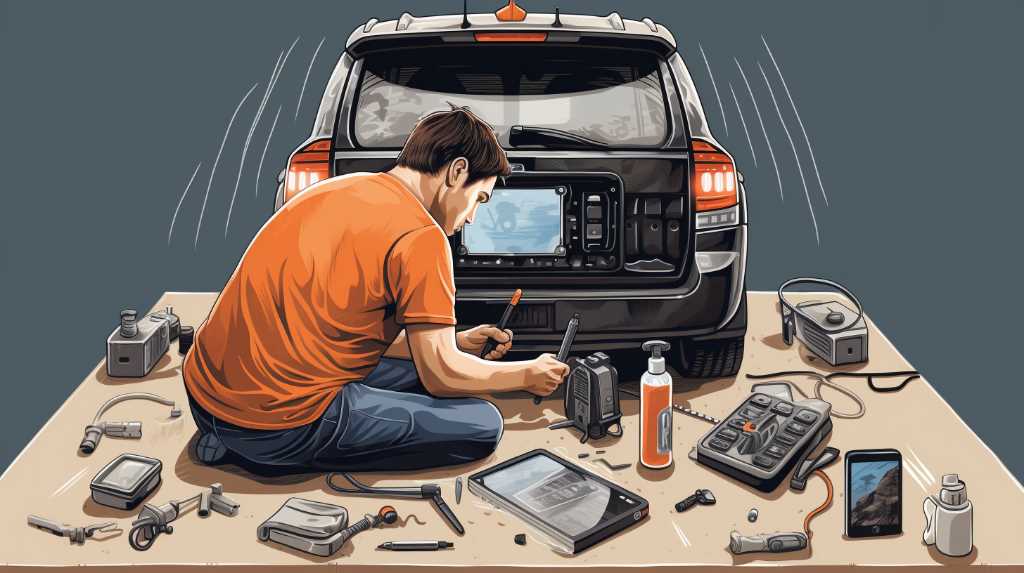
Steps for Installation Preparation
Before diving into the physical installation, make sure you’ve gathered all the necessary tools and equipment. You’ll need a drill, screwdriver, wire cutters, and possibly a socket set, depending on your vehicle’s requirements. It’s also wise to have electrical tape and cable ties on hand to secure any loose wiring.
Next, choose the ideal locations for your cameras. You want clear views with minimal obstructions, typically at the rear and sides of your vehicle. Consider the camera angles and the area each camera will cover. You’ll want to avoid blind spots to ensure maximum coverage.
Review the camera system’s manual thoroughly. It’ll guide you on the specific installation process for your model, including how to sync the cameras to the display monitor and any required software updates or configurations. This step is crucial; overlooking details could lead to poor performance or even damage to the system.
Secure Camera Mounting Procedures
Once you’ve identified the optimal spots for your cameras, it’s time to securely attach the mounts to your vehicle using the provided hardware.
First, clean the mounting area thoroughly to ensure a strong adhesion. If you’re using a suction mount, dampen the suction cup slightly before pressing it firmly against the window or body of the car.
For screw mounts, hold the mount steady and mark the drill points with a marker. Use a drill to create pilot holes, being careful not to drill too deep. Align the mount over the holes and screw it in place, tightening the screws just enough to hold the mount firmly without stripping the threads.
If your kit includes adhesive pads, remove the backing and press the mount onto the chosen spot with strong, even pressure. Hold it for about 30 seconds to ensure it’s properly adhered.
With the mount in place, slide the camera onto the mount according to the manufacturer’s instructions. Make sure it clicks or locks into place, confirming it’s secured.
Electrical Connection Essentials
Now that you’ve mounted your camera securely, it’s crucial to focus on the electrical connections. You’ll need to ensure you’re using the right wires and that all connection points are firm to prevent any power disruptions. Additionally, it’s essential to weatherproof your electrical components to protect against the elements.
Choosing Proper Wiring
Selecting the right wiring is crucial to ensure your wireless vehicle safety camera operates reliably and is properly powered. You’ll need to choose a wiring kit that can handle the electrical demands of the camera. Look for wires with a gauge thick enough to carry the current without overheating or voltage drop over the length you’ll run them. Typically, a 12- or 14-gauge wire is sufficient for most vehicle safety cameras.
It’s also important to ensure that the wiring is insulated and durable enough to withstand the harsh environment of a vehicle’s interior. This includes resistance to heat, cold, and potential abrasions. Double-check that the wiring kit comes with all the necessary connectors for your specific camera model, as well as any fuses or circuit protection to prevent damage from electrical surges.
Secure Connection Points
After choosing your camera’s wiring kit, it’s essential to make sure that each connection point is securely fastened to prevent any electrical failures. You’ll want to locate the camera’s power and video transmission cables. Ensure they’re tightly connected to the corresponding ports on your vehicle, usually found within the fuse panel or a dedicated electronics area.
Use cable ties to secure loose wires away from any moving parts or heat sources. This prevents damage and disconnection as you drive. Double-check that the ground wire is attached to a clean, bare metal surface for a reliable connection.
Lastly, apply dielectric grease to protect the connections from moisture and corrosion, ensuring long-term functionality. Your attention to these details guarantees a smooth, uninterrupted video feed for your safety on the road.
Weatherproofing Electrical Components
Ensuring your vehicle’s safety camera connections are weatherproofed is critical to prevent moisture-induced damage and maintain system reliability. Start by selecting connectors designed for outdoor use, marked with a suitable Ingress Protection (IP) rating. Look for IP67 or higher, which means they’re dust-tight and can handle temporary submersion.
Next, apply dielectric grease to the connectors before assembling them. This grease repels water and prevents corrosion without disrupting the electrical connection. When you’ve connected the cameras, seal any gaps with silicone sealant. This adds an extra layer of protection against water and dust.
Finally, use flexible, waterproof conduit to protect exposed wiring. Secure it well to your vehicle, ensuring that there are no loose ends where water can enter. Follow these steps, and you’ll significantly extend the life of your safety camera system.
Troubleshooting and Maintenance Tips
Your wireless vehicle safety camera’s peak performance hinges on regular maintenance and effective troubleshooting. Don’t wait for issues to arise; schedule routine checks to ensure everything’s working as it should. Clean the camera lenses with a soft, dry cloth to prevent dirt build-up that can obscure your view. Make sure to check battery levels frequently if your camera is battery-powered, and replace or recharge as needed.
If you’re experiencing connectivity issues, first ensure that the camera and your display device are within range. Most wireless cameras have a maximum range, and obstacles like thick walls can impede the signal. Try repositioning the camera or the receiver to improve the signal strength.
Occasionally, you might notice the camera feed is lagging or freezing. This could be due to interference from other wireless devices. Check for gadgets that operate on the same frequency and either turn them off or move them further away from the camera system.
Lastly, keep firmware and software updated. Manufacturers often release updates that fix known bugs and improve performance. If you run into a problem you can’t solve, don’t hesitate to contact the manufacturer’s customer support for assistance. They’re there to help you get the most out of your safety camera.
Frequently Asked Questions
Are Wireless Vehicle Safety Cameras Resistant to Harsh Weather Conditions, Such as Heavy Rain or Snow?
Yes, most wireless vehicle safety cameras are designed to withstand harsh weather, including heavy rain and snow, ensuring you’re always able to monitor your vehicle’s surroundings no matter the conditions.
Can Wireless Cameras Interfere With Other Electronic Devices in My Vehicle or Nearby Vehicles?
Yes, wireless cameras can interfere with other devices due to signal overlap, but it’s rare. You’ll usually find they’re designed to minimize disruption, so you shouldn’t worry too much about interference.
Is There a Significant Delay in the Video Feed From the Wireless Camera to the Monitor, and Can This Affect Driving Safety?
You might notice a slight delay in the video feed, which could impact your driving safety, especially when relying on it for real-time decisions like reversing or monitoring blind spots.
How Do Wireless Vehicle Safety Cameras Hold up Against Potential Hacking or Unauthorized Access?
You’re right to be concerned about security—wireless vehicle safety cameras can be vulnerable to hacking, but choosing models with encryption and regular updates can help safeguard against unauthorized access.
What Is the Expected Battery Life of a Wireless Camera, and Are There Any Tips for Extending It?
You can expect your wireless camera’s battery to last 1-3 years. To extend it, turn off unnecessary features, reduce recording resolution, and ensure it’s properly charged according to the manufacturer’s instructions.
Conclusion
You’ve now got the know-how to install wireless vehicle safety cameras. Remember to choose the right system, prep carefully, and follow secure mounting steps. For electrical connections, always double-check for safety. If you hit a snag, use those troubleshooting tips to smooth things out.
Stay on top of maintenance to ensure your cameras keep you safe on the road. Drive confidently, knowing you’ve boosted your vehicle’s safety with your own two hands. Safe travels!
Related Articles
Be sure to also check out these articles right here at Motion Performance Motorsports
The Complete Buyers Guide for Backup Cameras
Next Backup Camera Article: What Do Cameras Add to Vehicle Safety?
Previous backup Camera Article: Retrofitting Your Older Vehicle With a Backup Camera

Hey there, I’m Terra Frank, the driving force behind Motion Performance Motor Sports. I’m thrilled to have you here, exploring the fascinating world of cars, trucks, and everything related to automotive performance and accessories.